Friday, June 19, 2015

DIY FARM TABLE


I had hubby build me a farm table!  Yay!  One night last week I asked him if he thought it was possible.  The following day he was doing research on how much he thought it would cost and the next thing you know, we're on our way to Home Depot to pick up all the supplies

We scoured the internet for farm table plans and found that ana-white.com had the best plans.  We kinda used one of her plans but then hubby tweeked it, see his scribbles in the above image.  It's a very basic table, nothing  fancy to it which is probably what farm families built at the turn of the century.  They just needed to get a table up for their large families  That's the way I wanted it too,  simple and rustic.


When I got home from my volunteer job at the shop hubby was more than half way done with the table.  I got so excited, it was turning out really well, he was doing a good job!  Please note:  Hubby works in his jammies - don't judge ;)

I helped him turn it upside down and set it on top of our smaller table so that he can work on the bottom.  Once he was done, I went ahead and rubbed on some wood conditioner.

Once the conditioner dried (in about 15 minutes) I went ahead and gave it two coats of stain (ACE - Jocabean).  I love dark wood!!

Once we turned the table right side up,  I immediately started staining and realized later after the fact that I forgot to apply the wood conditioner first.  Ugh!!!  So the conditioner is supposed to make the wood easily absorb the stain and allow it to distribute evenly without any blotches.  So when I  applied the stain, I applied it slowly and carefully and wiped the excess immediately to prevent any o blotches from building up - whew!!

Two coats of stain later with some drying time and voila!!  Here she is!  Didn't it turn out absolutely wonderful??  I am ecstatic and thrilled with it.  I love the way these pictures came only because it was in the morning when the sun was shining through the deck doors.

Now that I have a larger table, I need to find some matching chairs


You won't believe it but this table cost less than $150!!  We already had the stain so that saved us a few pennies but other than that, hubby had to buy everything else.  It took us a week from start (shopping at HD) to finish to build this table. 

He is now building another for the shop and if it sells, he'll just make another one.  He doesn't mind, as long as he's physically able he'll be more than thrilled to keep on building more.

My dining room is my next focus since I've basically ignored it from the rest of the rooms in the house.  I will be painting and possibly adding wainscoting or bead board, hopefully by September.

So, if you've been wanting a farm table, it's so easy to build one.  If hubby and I can do it, so can you!

Until next time,


SHARED WITH:

Thursday, June 18, 2015

Who Let the Cow Out?


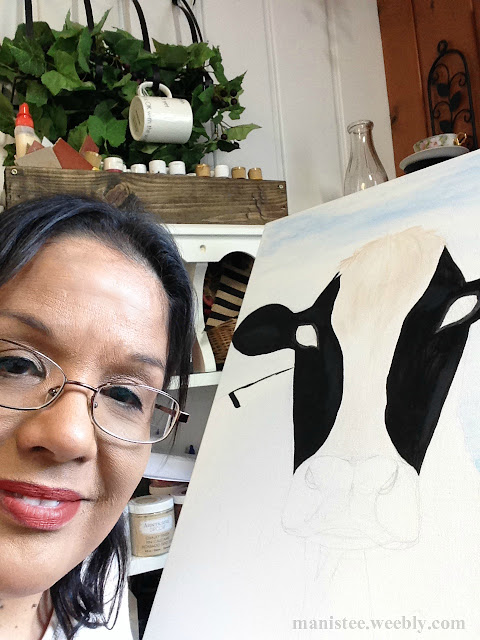
I've been wanting to paint a cow for a while and I finally got the time.  I've seen on the internet some really crazy cow paintings, including a Youtube video of some guy painting one on Mars.  So it gave me an idea to paint my cow in a prominent area in our town and I thought near the lighthouse would be best.  Here's the process:

I know this is a very bad picture no matter how many lights I turned on, perhaps that was the problem.  The pencil I used was very light but if you squint really hard you can see the beginning of the cow face.


I like painting the sides too - just seems to add more character, perspective to the painting


and there she is.  My plan is to sell her in my booth at our local artisan mall but I really am tempted to keep her.

Have a great weekend!  Until next time,


Saturday, June 13, 2015

Mini-Pallet Transformation


I have a confession to make.  I bought this mini-pallet at Michaels for $7. 

This is what it looked like after I stained it. . . .with Black Tea and Steel Wool & Vinegar stain.  Check out my post HERE where I blogged about the stain.

Transformed it into a shelf/message center/sweater rack/coffe cup rack - you name it!!

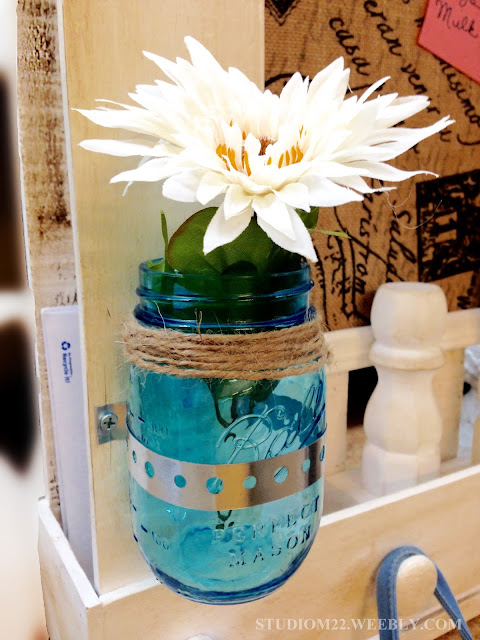
Had to attach a Ball jar to put a pretty flower in it.

I made some faux candle holders.


I found many of these ideas on Pinterest when I researched ideas for "pallet shelves".

I will be selling this shelf at the artisan mall where my booth is set up.  It was a fun project to do.

Until next time,

Tuesday, June 9, 2015

Painted Pebble Plant Markers


So much fun to make these plant markers.  A perfect summer craft for the kiddoes too, especially if you have potted plants and or a garden.

I found a bag of these pebbles at Michaels for only 6.99.  You can also find some in your yard or at the beach.  I'm sure if I still had kids around, I would have sent them out to find some for me but since I don't, I go shopping for them :)

Here are my pebbles.  There are around 10 in each bag. 

The first step is to prime them which I did with some chalk paint.  Let dry for an hour or overnight.


 I completely forgot to take pictures while I designed and painted the stones so here I have them already painted, stamped and with a coat of polyurethane.  I have a plethora of acrylic paint colors and wanted mine pebbles to pop out in color.  I gave each pebble at least 2 coats of the acrylic paint. 

The lettering on the pebbles were done with these wood stamps I also found at Michaels.  I also used a black sharpie pen for the circle.  Once I stamped each pebble I let it dry for about an hour and then covered each pebble with the polyurethane, one side at a time.

 And here's my favorite part, placing them with their matching plant :)


Saving the best one for last, the lady bug.  Isn't she...he cute?? :)  Just adds that special touch to my potted plants :)


Hope you're having a great start to your summer.  Paint some pebbles and get yourself out there and enjoy some gardening :)

Until next time,


Friday, June 5, 2015

Black Tea & Vinegar-Steel Wool Stain


A "Doubting Thomas" I am no more

I am SO impressed with this homemade recipe for wood stain.  I was not a believer until I had to experiment with it myself.

For the past year I've worked a lot with wood pallets, wood boards and planks.  I either find a pallet on the side of the road.  I also shop at our local box store for wood boards and planks that I take home to trim, sand and paint. I sell the signs I make at a local artisan mall.  I have scoured the internet and Pinterest to get more ideas on staining and painting my signs.  When I found this recipe and saw pictures of others who had used this stain, I found it very hard to believe, until now.

This is black tea and a plank I bought.  I stained the plank with one coat of  the black tea stain.  When it dried, it dried to almost the same color until. . . .

until it dried and then I added one coat of the vinegar stain.  When the vinegar stain dried I couldn't believe my eyes!!  The dark brown tint was beautiful, just the way I like it.  The color is very similar to the oil stain I use.   This stain dried in no time without any fumes although the vinegar and rusty smell was a little strong but nothing to worry about, I even had my windows closed!

Here's another sample:
Here's a small pallet I bought at Michaels for only 7.99.

Instant rustic!!  I only used the Vinegar & Steel Wool stain for this pallet.  I don't think I'll need to use the Black Tea stain much since  I love how this pallet turned out.

This is my jar of vinegar stain, it's around 10 days old.

Here's the recipe for the VINEGAR & STEEL WOOL STAIN:
Start one week to 10 days ahead or longer
1 large glass jar with lid (mine was a Prego spaghetti sauce jar), cleaned and dried
5 cups of white distilled vinegar, more if needed
2 steel wool pads (do not use SOS or Brillo pads)

Combine all the ingredients and let sit on a shelf, away from little ones if you have any.  Make sure to label the jar, don't want anyone drinking from it accidentally.

Shake often until all the steel wool has dissolved.  It should be ready to use in 7 -10 days.  Strain using a cheesecloth to remove any particles from the steel wool.  Wear protective gloves when staining.  Use a brush or a cloth to stain the wood, just like you would if you were using the regular oil-based stain.

BLACK TEA STAIN
10 oz. boiling water
2-3 tea bags of any kind of black tea
Small jar with lid

Brew black tea until it cools.  Use instantly and save the rest in a small jar.  Again, don't forget to label it.


So does anyone know if this stain stands well in sunlight? (Hubby was wondering).
If anyone out there knows anything else about this stain that I didn't mention, please leave a comment.
I'm thrilled that this stain only cost pennies compared to the oil-based kind in the stores.

I have a large can of oil based stain I don't think I'm going to be using anytime soon, anyone want to buy it?

I BELIEVE!!! :)

Until next time,

Wednesday, June 3, 2015

German Cucumber Salad (Gerken Salat)


INGREDIENTS
2 English cucumbers
1/4 red onion
1/4 cup fresh dill
1/2 - 2/3 cup white distilled vinegar
Salt
Freshly ground black pepper

Start in the morning or night before
Scrub and wash the cucumbers.

English cucumbers are very long and come wrapped individually.  I bought these at Meijers.

With a potato peeler, peel off the skin leaving some on to give it a striped effect

Slice the cucumbers very thin.  If I had a mandolin the cucumbers would have been sliced evenly so I tried as best as I could without chopping off any fingers

Do the same with the red onions, slice very thinly then add to the cucumbers

Roughly chop the fresh dill and add to the cucumbers and onion

Add the vinegar to the cucumbers, onion and fresh dill

Add salt and freshly ground pepper to taste.  Combine and refrigerate to at least 4 hours.


Enjoy!

This was one of my favorite salads that I ate when we lived in Germany.  Tart and delicious, just the way I liked it and I was so impressed with how thin the cucumbers were sliced.  Soon after arriving in the states I developed a reaction to cucumbers to where I wasn't able to eat them any more and that made me very sad. I loved them but they didn't love me.  Fast forward about 30 years to last weekend.  I told my sister who had been staying with us before their big summer long visit to Texas, that I would make her and her hubby a German meal.  Homemade Schnitzel and Spaetzle (German breaded fried pork loin chop and noodles).  I mentioned to her how much I loved the German Cucumber Salad and she said she could make it as she had the recipe.  Sis also lived in Germany but not at the same time I was there.  When she was making it I decided then and there that I was going to try some even if it meant suffering through it later.  It just smelled so good while she was making it.  I had a plate full and guess what?  I did not get that knot in my stomach that evening nor the following day.  I was thrilled and I realized it must have been because of those type of cucumbers.  I Googled them and found out they are called English Cucumbers and aren't as strong as regular cucumbers. Found out these other facts about them too:  Nearly seedless | Cost a little more but worth it | Have a greater texture - don't get as mush and soggy | Burpless :)

This is a refreshing summer salad and will go with almost anything you cook on the grill.  It's SO simple to make.

Hope you're having a great start to your summer!  Until next time,