Monday, December 22, 2014

Two Pies in a Day

Actually, it took five hours in the kitchen to make these two pies.  A Cherry pie and and Mincemeat Pie.  I don't consider myself a pro at making pies, especially the kind with two crusts.  Took a lot longer than I thought but just in time to relax with a cup of hot tea and a college football bowl game on TV.

I used Pioneer Women's "Perfect Pie Crust"  x 2 = a total of FOUR pie crusts.  Making homemade from scratch pie crusts will definitely win you lots of points!!  So worth it!!

MINCEMEAT PIE

Once I made the pie crusts.  I used two for the following:
Fold in edges after trimming

Follow simple directions on the Mincemeat jar, pour the mixture into the pie crust.  Set aside.

Roll out the second pie crust.

Use a sharp pointy knife to cut out design for top crust.


Gingerly wrap the crust around a well floured roller

Gingerly unroll the crust over the Mincemeat mixture making sure it's centered

Trim off the edges and tuck underneath

Use a spoon to seal the edges

With a milk and egg wash, brush over the pie.  Bake pie at  425F degrees for 40 minutes or until golden brown

Set aside to cool before refrigeration.

While the Mincemeat Pie was baking, I started on the Tart Cherry Pie

TART CHERRY PIE by Love & Olive Oil
Prepare pie crust using the bottom crust first then according to the Pioneer Woman's directions. Set aside.

  • 6 cups (2 pounds) frozen tart cherries
  • 1 cup granulated sugar, divided
  • 3 tablespoons cornstarch
  • 1 teaspoon lemon juice
  • 3/4 teaspoon almond extract
  • 1 large egg mixed with 1 tbsp. milk
  • Turbinado or raw sugar, for sprinkling (optional)
Using the second set of pie crusts, prep the bottom crust in pie pan, place in refrigerator to chill.
Toss frozen cherries with 1/2 white sugar

Place cherries in a mesh strainer set over bowl to catch juices.  Let sit, stirring occasionally to redistribute the juices, for about 1 hour or until cherries are mostly thawed and 1/4-1/2 cup of liquid has drained out the bottom.

 Place drained cherries is medium pot.  Add lemon juice.  


Whisk the reserved cherry juice, other 1/2 cup of sugar and cornstarch.  Mix until there are no clumps


On medium high heat, pour cherry juices into cherry mixture.  Stir constantly with a silicone spatula making sure to scrape up sides and bottom of pot.  Bring to a boil until mixture thickens.  Remove from heat and add Almond extract.


Pour cherry mixture into chilled pie crust and return to refrigerator to chill again.


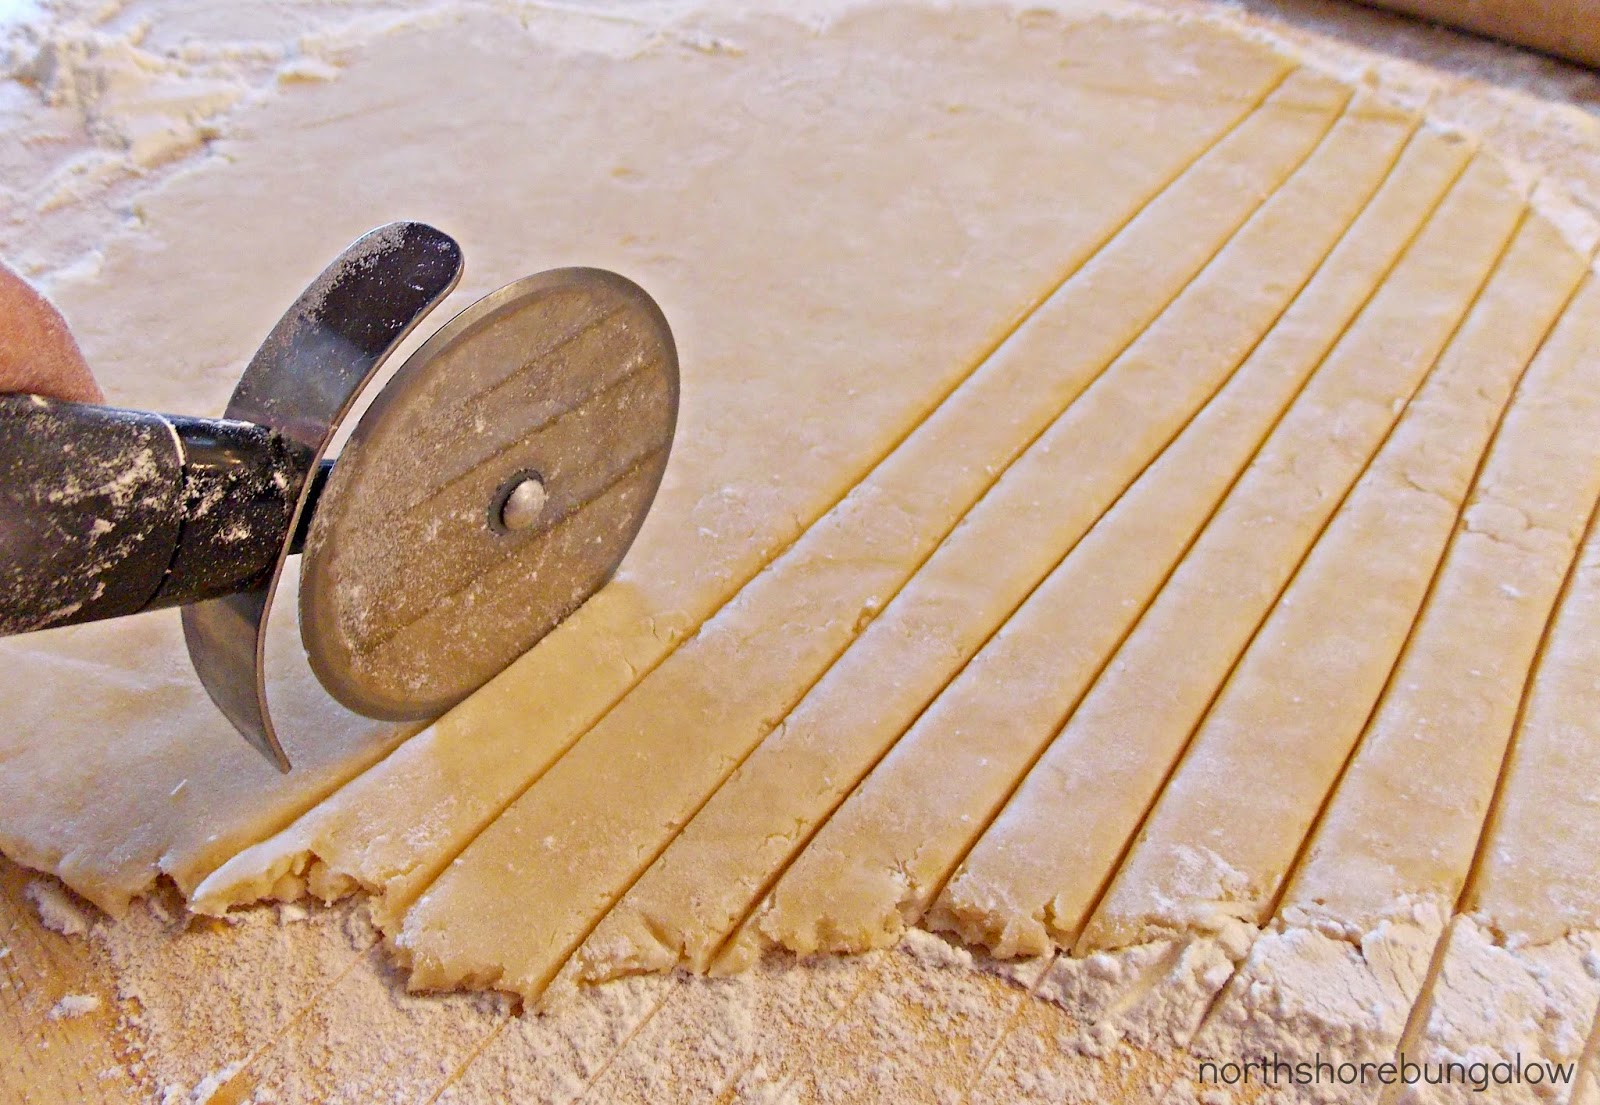
While the cherry mixture is chilling, roll out the top crust.  Using a pizza cutter, cut into 1/2 inch wide slices.


Remove chilled cherry mixture from refrigerator.  Wet edges with milk/egg wash.


This is how I started to weave the lattice top crust.  Don't know for sure if I'm doing it right.


Very difficult for me to try to explain how it's done so perhaps you can understand Lindsay's instructions "Love and Olive Oil" .

 Wet the lattice top crust with the milk/egg mixture and sprinkle with Turbinado sugar.  Bake in 400F degree oven for 35 minutes or until golden brown.


Whew!  I'm so glad these are done.  This lattice pie crust was quite the challenge.  I loved making them but did not realize I would be on my feet for almost five hours straight.  I realize I need to work on presentation so practice makes perfect.  I have never made Mincemeat pie from scratch, has anyone reading this?  I was so glad I still had enough frozen cherries leftover from this past Summer.  These are real Michigan cherries, freshly picked by a friend named Carol and her kids.  Thanks Carol!!

Hubby was very sad I didn't let him dig into either one of these because I'm saving them for our Christmas Eve dinner.  I like making my pies and cookies ahead of time.  The day before Christmas Eve I will work on a Cheeseball, prep two vegetable dishes and as well as prep Tom Turkey.

Here's to more good baking and good cooking for those of you who have the honor this holiday.  Merry Christmas to all!!  Until next time,


SHARED WITH:

Thursday, December 18, 2014

Chicken Cabbage Stir Fry

Ingredients
~ 3 chicken breast halves
~ Olive oil
~3 cups green cabbage, shredded
~ 1 tablespoon cornstarch
~1 tablespoon fresh
ginger, minced
~2 garlic cloves, minced
~1⁄2 cup water
~1 tablespoon soy sauce


Directions

Cut chicken breasts into strips.


Heat oil in a frying pan.


Add chicken strips and stir fry over medium-high heat, turning constantly until done.  I stir fried it in two sections so not to crowd the chicken and steam cook it but to stir fry it which brings out its savory flavor.  Set aside.


Add more oil then add cabbage and sauté 2 minutes until cabbage is crisp-tender.  You'll be surprised how much of it cooks down to almost nothing!

 Turn heat down to medium.  Add the ginger and the garlic and stir for 1 minute.  Add chicken and combine the whole mixture together.  The original recipe asks for powder spices so if you don't have fresh ginger and garlic, go with the powder (1/2 tsp. ginger and 1/4 tsp. garlic powder).  I for the most part try to use fresh spices.  They just taste so much better for me.


Mix cornstarch, add water and soy sauce, and mix briskly until smooth.

Stir sauce into chicken/cabbage mixture.

Cook until sauce has thickened and chicken is coated, about 1 minute.

 Serve with white rice or eat alone.  Either way it's delicious!


Enjoy!

A friend of mine posted this on her facebook page and when my eyes first saw it, I was anxious to make it.  It looked so yummy, I'm ready to make more.  My meat and potatoes man wasn't too crazy about it though.  So, when I make it again next week, I'll just make him a hamburger.  That always makes him happy.  Here's the link to the original recipe:  Chicken Cabbage Stir Fry posted by Louise Gibson.

Until next time,

Wednesday, December 10, 2014

Grandma Cole's BonBons


It never failed, every Christmas we would get a package from Grandma Cole (hubby's mother) containing dozens of all kinds of homemade goodies, including her famous Chocolate BonBons.  Grandma Cole loved baking.  She started early in the season and would spend many a day in the kitchen baking hundreds of goodies.  Everybody loved her BonBons though.  They were big, fat, tasty and very chocolatey.

As Grandma Cole got older though, it got harder and harder for her to bake.  She would still make the BonBons but not as many.  Now that Grandma Cole is gone, we miss receiving her packages of goodies.  I have her recipe box and found the BonBon recipe.  Since we now live hundreds of miles from our kids, I feel it my responsibility to take over and send them a package full of homemade goodies, just the way Grandma Cole used to do for us.

Grandma Cole made two kinds of BonBons.  One had a peanut butter filling and the other had a creamy coconut filling.  Here are the recipes:

Peanut Butter Chocolate BonBons
1 1/2 sticks of butter, softened
1 1 lb. box (or 4 cups) of confectioners sugar
1 cup of peanut butter
1 1/2  10 oz. Pkg of Ghiradelli melting wafers  (Grandma used paraffin wax and I chose to go the easier route)
1 cup of peanuts, crushed

Combine the butter, confectioners sugar and peanut butter until creamy.  Form into balls.


Follow directions on the package on melting the chocolate wafers.  I used the double boiler method.  With two forks, dip balls into melted chocolate.  Gently roll the ball around to get it covered completely in chocolate.

Gently remove, tap excess chocolate

 and transfer to wax paper covered tray.  Repeat dipping process with each ball.  Set aside to cool.

Chop peanuts in food processor or by hand.  Roll chocolate bonbons in peanuts (this is optional).  Reserve extra peanuts for next recipe.

Set aside to harden.  Since I'm planning to send these miles and miles away, I went ahead and wrapped each one individually in wax paper, just the way Grandma Cole used to do.

Coconut Creamy Chocolate BonBons
1 can condensed milk
2 tsps. vanilla extract
2 1 lb. boxes (or 8 cups) of confectioners sugar
2 cups of angel flake coconut
1 pinch of salt
1 cup of softened butter
2 cups of chopped nuts
1 1/2 10 oz. pkg. of Ghiradelli melting wafers (again, Grandma used paraffin wax and I chose to go the easier route)

In a large bowl, combine all the ingredients, except for the chocolate wafers, until well blended.  I started out mixing it using my Artisan Kitchen Aid stand mixer but it was too much for my mixer so I removed the bowl and dug my hands into the dough. It took a bit of muscle work to get it mixed together well but I did it!  Refrigerate dough for at least a 1/2 hour.

Remove from refrigerator and roll into balls.  Place into freezer until firm, about 1/2 hour.

Melt the chocolate wafers according to pkg. directions.  Dip the balls into the chocolate (follow the same process as the Peanut Butter BonBons).  Place on wax paper covered tray and let harden.  I also wrapped these individually into wax paper for the same reason.

Both recipes made around 126 BonBons!  Whew!  I wrapped them up in wax paper and then placed them in some baggies and into the freezer.  Tomorrow I make sugar cookies.

What a good feeling it is to know that these goodies will put a smile on the face of my kids and grandkids.  Just like when we would receive Grandma Cole's package of goodies.  Paying it forward.

Until next time,